
I’ve got a very little unused PC desk which I’d like to use for my retro computing station.

My old PC desk
As you can see in the picture above, the desk is designed for a typical desktop PC set: there is a bottom shelf for PC placement, a sliding shelf for keyboard and mouse pad, and on top there’s room for a monitor and little more.
My idea is to put the A500 power supplier in the bottom shelf, the Amiga 500 and the external floppy drive in the sliding shelf, the 1084S RGB monitor and the mouse pad on the desktop.
The first problem I faced is the sliding shelf position: there isn’t enough room for the Amiga. Thus I removed the screws from the shelf runners and repositioned them a bit lower.
Now that there’s enough room between the sliding shelf and the desktop, I can try to put all the components into the desk. This time I’m facing another problem: while the white back plane behind the sliding shelf is perfect when you need to hide cables coming from the bottom placed PC; it becomes very awkward when all the cables come from the back side of the A500 sitting on the sliding shelf. After trying to make a hole in the back plane, I eventually decided to remove it.
I realized that the position of the power supplier, on the bottom shelf, is too far for easily turning on/off the Amiga. Moreover, my monitor power button, as happens with all the mechanical elements, is becoming old and you have to press it many times to turn it on. I had an idea to solve both this problems: connecting everything to a multiple socket placed on the desk side. I’m using a multiple socket with a power switch, so that I can turn everything on and off just by pressing a button placed in a very comfortable position.

A multiple socket controls the monitor and the A500 power
The last thing I need to fix is the monitor position which is too low. As you can see in the picture below, for a comfortable ergonomic desk setup the top of your monitor should be at the same height of your eyes.

Desk ergonomics
So I decided to build a little wood table for placing the monitor at the correct height.
Building a table to lift the monitor up

Preparing the tools

Inserting the screws for the legs

Attaching the legs

Putting the wood glue

Books providing clamping pressure
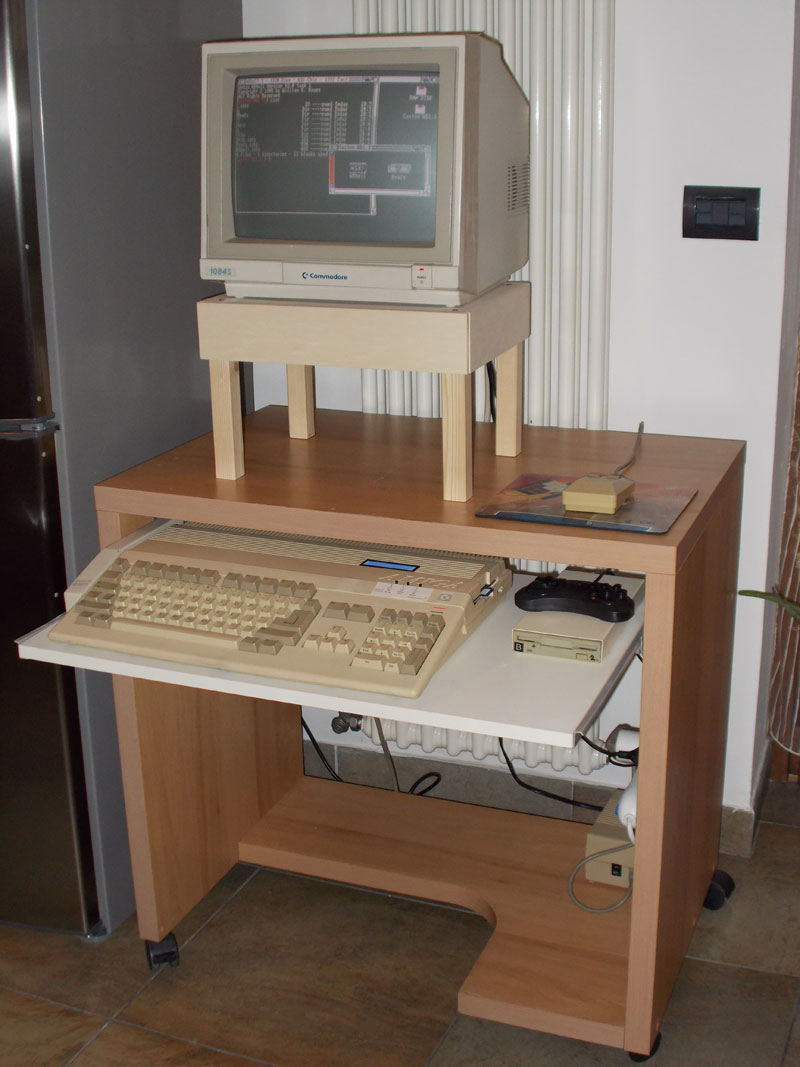
My little Amiga workstation